Documentation Index
Fetch the complete documentation index at: https://docs.replay.sale/llms.txt
Use this file to discover all available pages before exploring further.
Each webhook URL that you put into Replay is specific to the premade roleplay where you input it.If you have multiple premade roleplays that should all use the same Zap, you’ll need to follow steps 1 & 3 for each roleplay, all using the same webhook URL from Zapier.
On Replay
- Go to the Premade Roleplay you are using as a Lead Gen tool
- At the top right, click the ellipsis -> export
- In the modal that pops up, go to the Lead Gen (Demo) tab
On Zapier
- Create a new Zap
- Add a Webhook component that uses a catch hook event
- On the Test tab, copy the webhook URL that Zapier generates for you
- Head back to Replay
Back on Replay
- Paste the Webhook URL from Zapier into the Webhook URL box on Replay
- Make sure to save!
- Click Test to send a contact with test information to Zapier
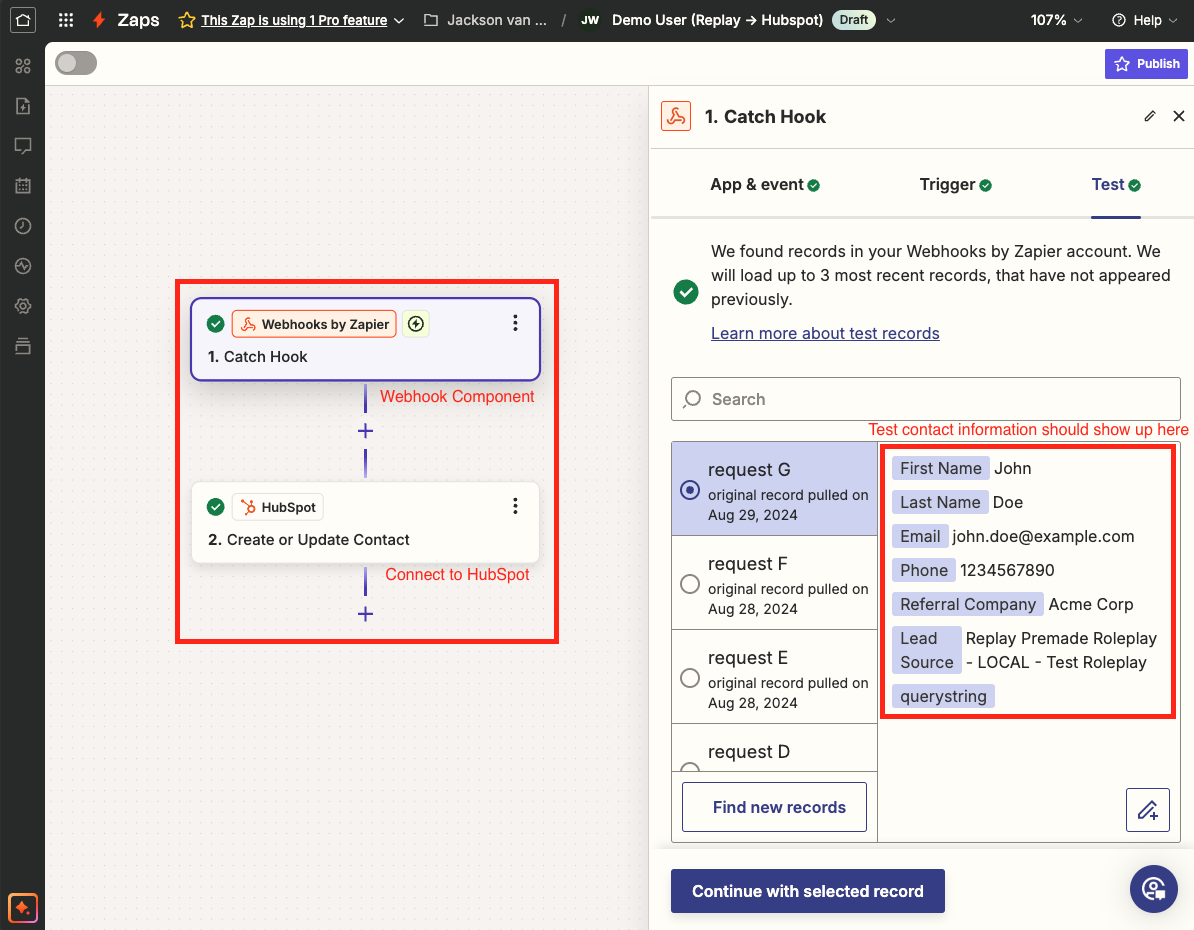
Back to Zapier
- Still on the Test tab, click Find New Records
- You should now see a record containing the test contact information from Replay!
- Next, add a component to your Zap to send the information to your CRM
- Make sure to use a Create or Update event from your CRM
- Inside of your CRM’s component, go to the Action tab and map the values from Replay to the values you want in your CRM
- Publish your Zap! Once it’s published, Replay will send information for anyone who fills out the form on your Lead Gen roleplay to Zapier, and from Zapier to your CRM!
Reach out to us at hello@replay.sale or through Slack if you need any help!